Tuesday 13 May 2014

Online Earn Money In Pakistan

Online Earn Money In Pakistan


Today I will show you that how to earn online money in Pakistan for free. All you have to do is click on the ads and watch them for some couple of seconds after that you will receive your amount. Isn't that easy?
I have checked 2 PTC sites by myself and these both sites really pays!

1. PaidVerts:

PaidVertsClick This Link To Sign Up 

PaidVerts is a really cool PTC site and it is developed by My Traffic Value and they have paying there customers for years. It is a very unique kinda PTC site. This site has a unique BAP system which means Bonus Ads Points, this site totally depend upon these BAPs, they will provide you 5 BAPs daily and you have to click them to collect more BAPs and that will also add 7 more days to your account. 1 Bonus Ad Points equals to 0.0005$ if you have 1000 BAPs then you will get 1$. This site is 100% legit and paying its customers.  The minimum payout is 1$ only. You can buy upgrades to increase your earnings. 


2. Ojooo:


 Click This Link To Sign Up

Ojooo is another PTC site and it is online for a very long time and it is paying its users. In this website there are many ways to earn, by watching paid advertisements, by completing offers, or by watching videos. You can also upgrade your account to Premium, Premium+, or VIP to enhance your earnings. The first minimum payout is 2$ after that you have to reach 6$ to cashout, the Premium members can cashout their earning when they reach the balance of 2$. It is a very legit site. You receive daily ads and you have to watch for few seconds to earn.


Tuesday 8 April 2014

Saturday 15 March 2014

How To Remove Your Google Web History

How To Remove Your Google Web History, Tips and tricks, google web history,


How To Remove Your Google Web History

 As many of you already know, that Google keeps an eye on you, on almost everything you do on a Google website, provided that you signed in any of Google's websites. Everything you search for is saved to Google and can be used against you in the future. Search data can show personal information about you, like facts about your location, interests, age, religious views, and much more. You can, however, choose to not be so vulnerable, and can erase all your Google web history to keep you safe from that kind of accident.
In this tutorial, I will show you how to remove all of your Google web history. So let's get started!

  • After that, click on the gear like icon on the upper right corner of the search result page and then go to Search History.
How To Remove Your Google Web History, tips and tricks, gear icon
  • Now, again click on the gear like icon and then go to Settings.
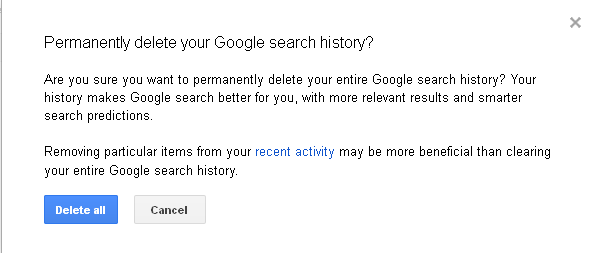
  • Click on the Delete All button. Then another box appears which ask you for confirmation. Now, click on Delete All button again, and your entire search history on the Google is removed.

How To Remove Your Google Web History, tips and tricks

If you want Google to stop storing your history again, then follow this simple step!

  • Click on the Turn Off button on the Settings page to stop Google from saving your history again. 

Sunday 9 March 2014

BIOS - How To Crack BIOS Password

BIOS - How To Crack BIOS Password, tips and tricks, bios password cracking,


How To Crack BIOS Password


This is a very much useful trick. If you have forgot your BIOS password then this trick will help you alot. I am warning you before to perform this trick on your own risk! So let's just get started:

1. Open the CPU
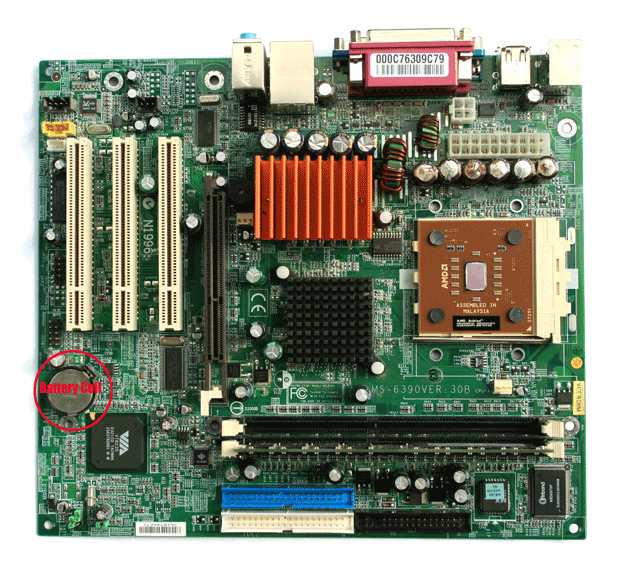
2. Now check the whole motherboard, you will notice that there is a coin like silver battery.
BIOS - How To Crack BIOS Password, tips and tricks, bios password cracking, motherboard,
(This battery is a 24/7 power supply for the BIOS, which is used to run the system clock when the main power is switched off. This small coin like battery also initiates the booting process when the power is switched on!)
3. Now, remove the battery from your motherboard.
4. Wait till 30 seconds, after that lace the battery back on your motherboard.
5. Now, when you switch on your computer you won't be prompted for the BIOS password.
(When you start the computer you have to set time/date of your computer)


How To Save A Webpage To PDF File

How To Save A Webpage To PDF File, tips and tricks


How To Save A Webpage To PDF File


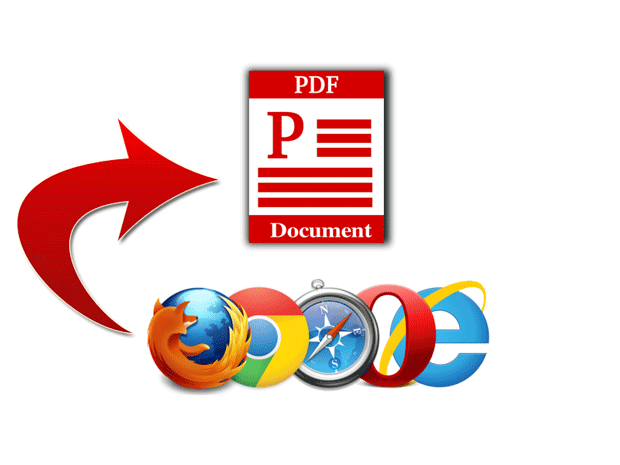
In this trick, I will show you how to convert a webpage to any PDF file format, which helps you to read your favorite articles without internet. It is a very useful trick for those who have limited time of internet connection. So let's just begin!

1. First of all, open Google Chrome.
2. Then open the webpage that you want to convert.
3. Now press Ctrl+P then it will open a print dialog box.
4. Now select the destination to Save As PDF and click on the Save button.
5. Now the webpage will be downloaded as a PDF file.


Google - How to Use Google As A Proxy Tool


Google - How to Use Google As A Proxy Tool, tips and tricks


How to Use Google As A Proxy Tool

This is a very amazing trick! you can actually use google translator as a proxy to visit blocked websites. To do this just follow the given steps:

1. First open your browser and type (https://translate.google.com)
2. Then copy the url of the website that you want to unblock.
3.select the language.
4. Paste the url in text section.
5. Click on Translate Button.
6. That's it, now you are using google translator as a proxy website


Proxy Sites - List of Top Proxy Sites

Proxy Sites - List of Top Proxy Sites, tips and tricks, proxy websites


Here is the list of some good proxy websites which you can use to surf anonymously on the web. You can use this proxy sites to open the websites that are blocked in your region/country.


List of Top Proxy Sites


  • http://www.aniscartujo.com/webproxy
  • http://www.badboysproxy.com
  • http://www.surfscreened.com
  • http://www.hagiomusic.info
  • http://www.greenpips.info
  • http://www.urlbrowse.com
  • http://www.hideipaddress.net
  • http://www.sneakfilter.com
  • http://www.browsestealth.com
  • http://www.sneak1.info
  • http://www.proxiesrus.com
  • http://www.surfindark.com
  • http://www.navydog.com
  • http://www.falsario.com
  • http://www.proxypit.com
  • http://www.proxypan.com
  • http://www.myspacewebproxy.org
  • http://www.allfreehere.info
  • http://www.takefreely.info
  • http://www.autobypass.com
  • http://www.proxcity.info
  • http://www.proxyzip.org
  • http://www.cheekyproxy.com
  • http://www.eggproxy.com
  • http://www.theschoolcloak.com
  • http://www.hidemefast.com
  • http://www.browseanywhere.info
  • http://www.404surf.com
  • http://www.cloakip.net
  • http://www.browsedark.com
  • http://www.dartprox.com
  • http://www.proxish.com
  • http://www.surfsneak.com
  • http://www.surfsneaky.com
  • http://www.browsehidden.com
  • http://www.filterhide.com
  • http://www.browsesneak.com
  • http://www.myspaceproxyy.com
  • http://www.browsesneaky.com
  • http://www.proxyz.us
  • http://www.sneakschool.com
  • http://www.iphide.com
  • http://www.proogle.info
  • http://www.greatproxy.info
  • http://www.playnsurf.info
  • http://www.realproxy.info
  • http://www.aplusproxy.com
  • http://www.ecoproxy.com
  • http://www.freedom.webtuo.com
  • http://www.slyuser.com
  • http://www.tenpass.com
  • http://www.pawxy.com
  • http://www.pawxy.org
  • http://www.logu.in

Saturday 8 March 2014

Facebook - Facebook Shortcut Keys

Facebook - Facebook Shortcut Keys, tips and tricks, facebook,


Facebook Shortcut Keys


  • Facebook Help Center = Shift+Alt+0
  • Facebook Home Page = Shift+Alt+1
  • Facebook Profile Page = Shift+Alt+2
  • Friend Requests = Shift+Alt+3
  • Messages = Shift+Alt+4
  • Notifications = Shift+Alt+5
  • Account Settings = Shift+Alt+6
  • Privacy Settings = Shift+Alt+7
  • Facebook Pages = Shift+Alt+8
  • Facebook Terms of Use = Shift+Alt+9
  • Enable Search = Shift+Alt+?
  • Write a New Message = Shift+Alt+m


If you have any questions regarding my post or my blog then don't forget to ask!


VLC Media Player - How to Convert Videos using VLC

VLC Media Player - How to Convert Videos using VLC, tips and tricks,


How To Convert Videos Using VLC

In this tutorial, I will show you how to convert videos using VLC media player instead of using a video converter. It is a very easy trick, all you have to do is follow the given steps:

1. Open your VLC media player.
2. Now, click on Media > Convert/Save...
3. Now select the video file you want to convert then click on Convert/Save button and another dialog box will appear.
4. After that click on Browse and select where you want to save the converted file. Under it you can see a drop down menu from which you can select the output video format.
5. Click on the Start button to start the converting process.
6. That's it you are done!

If you have any questions regarding my post or my blog then don't forget to ask them in comments!

Friday 7 March 2014

How To Enable/Disable Task Manager

How To Enable/Disable Task Manager, Tips and Tricks,


How To Enable/Disable Task Manager

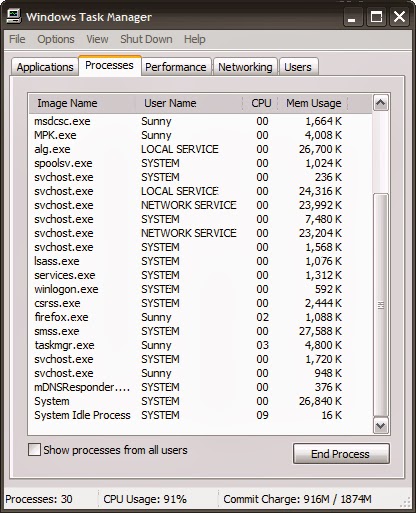
In this trick I'll show you how you can enable or disable task manager in your Windows OS. Follow the steps below:

1. Click on Start Menu and Click on Run.
2. Now write gpedit.mcs in the box and click OK.
3. In the Group Policy settings window.
4. Now, Select User Configuration
5. Select Administrative Templates
6. Select System.
7. Select Ctrl+Alt+Delete options.
8. After that Select Remove Task Manager.
9. Now double-click the Remove Task Manager option 
10. That's it you are done! 

To enable Task Manager again, simply disable the policy again and the task manager will be enabled like it was before.


Top 20 Secret Applications In Windows XP

Top 20 Secret Applications In Windows XP, Tips and tricks


Top 20 Secret Applications In Windows XP


There are some hidden applications in our Windows XP which we mostly don't know. To start these confidential applications you have to type the name of the application in Start Menu > Run.  The list of confidential applications in Windows XP are given below:

1. Disk Cleanup = cleanmgr.exe
    It is used to clean up disk.

2. Character Map = charmap.exe
    It is used to search unusual characters.

3. Dr Watson = drwtsn32.exe
    It is used for troubleshooting of the computer.

4. DirectX Diagnosis = dxdiag.exe
    It is a very useful feature of Windows XP. It is used for the diagnosis of audio/video cards.

5. IExpress Wizard = iexpress.exe
    It is used to create self-extracting / self-installing package. like ZIP files.

6. Clipboard Viewer = clipbrd.exe
    It is used to view the content of the Windows clipboard.

7. Windows Media Player 5.1 = mplay32.exe
    It is used to open Windows Media Player version 5.1

8. ODBC Data Source Administrator = odbcad32.exe
    It is used for database.

9. Object Packager = packager.exe
    It is used to insert an object into a specific file.

10. System Configuration Editor = sysedit.exe
      It is used to change the system.ini and win.ini.

11. Syskey = syskey.exe
      It is used to configure an account on the Windows XP.

12. MICR Soft Telnet Client = telnet.exe
      It is used to connect to the internet before there was a browser.

13. Driver Verifier Manager = verifier.exe
      It is used for monitoring the drivers present on your Windows XP.

14. Windows for Workgroup chats = winchat.exe
      It is used to chat with one another.

15. System Configuration = msconfig.exe
      It is used to control the startup applications.

16. System Monitor = perfmon.exe
      It is used to monitor your own computer.

17. Program Manager = progman.exe
      It is inherited from Windows 3.x desktop shell.

18. Remote Access Phone Book = rasphone.exe
      It is a application like the phone book.

19. Registry Editor = regedit.exe
      It is used for tweaking and editing Windows registry files.

20. Network Shared Folder Wizard = shrpubw.exe
      It is used to create a shared network folder.


How to Create Real Virus Using Notepad

How to Create Real Virus Using Notepad, Hacking tips and tricks


How to Create Real Virus Using Notepad


In this trick I will show you how to create a real virus that can actually damage a PC. Using this virus you can delete the entire Windows of your enemy. This is a very simple and easy trick. So, let's get started!

1. Go to Start Menu and open Notepad.
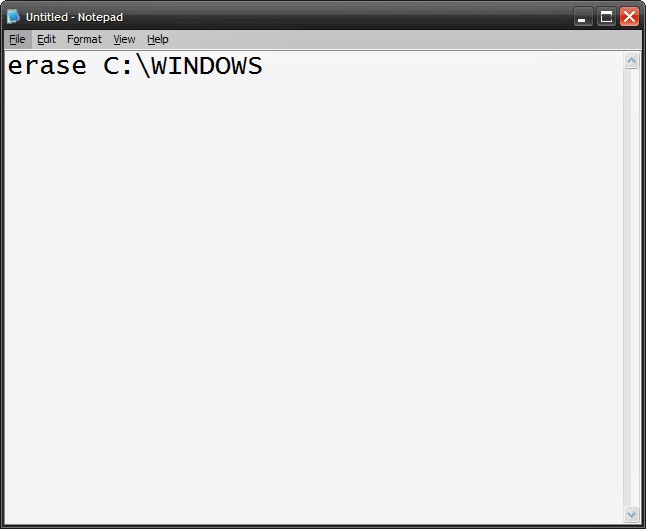
2. Now, type erase C:\WINDOWS and save it as any name you want for example virus.cmd (Don't forget   to write .cmd in the last of the file)
3. Don't open the file on your own computer or otherwise your Windows will be deleted.
4. That's it!

So, that's the virus that you can use to delete the Windows of your foes. You can also use this script to delete the undeletable files. Just remove the directory which is given in step:2 and write the directory, where the file is present, that you want to delete. I hope you enjoyed this trick!!


Thursday 6 March 2014

How to Make Bootable USB

How to Make Bootable USB, Tips and Tricks


How to Make Bootable USB

If you want to install Windows XP on your computer and your CD Drive is not working or you haven't any CD to install Windows, than you can make your own bootable USB device for installing Windows XP, Vista, 7 or 8.
It is a very simple trick to make a bootable USB device. Commonly all the Notebooks have the option in their BIOS to boot from USB. Many other motherboards like Intel 865, 915, 965, etc has also the option to boot from USB device. So it is very simple and useful way to install Windows on your PC.
To make a bootable USB device, at first you have to install a program named "Wintoflash", you can easily download this program from the internet. This application is very small in size so it won't take much of your time. After that, install the program on your PC and then start this program. It will display two various paths. In the first browse option you have to select Windows XP disk and in the second browse option then you have to select your USB device. Click next to proceed. It will copy all files of Windows XP from CD to USB. Now click on Finish. That's it you are done!. Now you can use your USB device to install Windows on your computer.
 

Wednesday 5 March 2014

How to Use Free Internet In Telenor

How to Use Free Internet In Telenor


 How to Use Free Internet In Telenor

Today I am gonna show you an amazing trick, by using this trick you can use free internet on telenor 24 hours!

Telenor GPRS Settings:

Access Point: MMS
IP Address: 212.166.64.10
Proxy: 3128
 That's it you are done!!

Apply these settings on your mobile phone and use free internet on telenor. 


Saturday 1 March 2014

How to Lock Your Folder Without Any Software

How to Lock Your Folder Without Any Software, computer tips and tricks


If you want to protect your private files in a folder at home or in any office, then you have to lock that folder. There are many applications available on the internet to lock your folders but in this tutorial I will tell you a trick which will help you to lock your folder without using any kind of programs.
So, Here it goes:

  • Create a folder in any drive you want, in which you want to keep your private files. 
  • Now, create a text file in the same drive, for instance I had make a folder in Drive: C so I will have to create the text file in the same drive.
  • Type this code in the text file:
ren personal personal.{21EC2020-3AEA-1069-A2DD-08002B30309D}
  • Save this text file as "hide.bat", now you will see a .bat file in that drive.
  • Now, again create another text file in the same drive and type:
ren personal.{21EC2020-3AEA-1069-A2DD-08002B30309D} personal
  • Now, save this text file as "unhide.bat".
  • That's it you are done!
  • Click on the "hide.bat" file and the folder will be hidden and if you want to visible it then click on the "unhide.bat" file.   


If you have any questions then don't forget to ask it in comments!!!!

How to Fix Don't Send Error in Windows XP


How to Fix Don't Send Error in Windows XP, Computer tips and tricks, tips, tricks, pc tricks,


How to Fix Don't Send Error in Windows XP

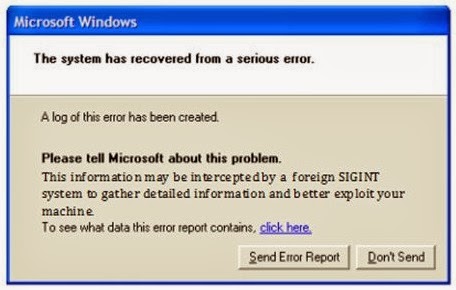
Some time a blunder happens whereas you're exploitation XP. to a small degree dialogue box seems asking if you would like to send report back to Microsoft for this accident or not? largely we have a tendency to|once we|after we} press the button “Don’t send” The package we square measure exploitation, turns off and that we don't get any probability to save lots of our operating information. you'll solve this downside merely and when this method you may not see this error box once more. simply follow these steps.

Steps to Fix Don't Send Error

  • Right-click on My Computer and go to the Properties 
  • On System Properties dialog box then click on "Advance Tab"
  • Click on the error reporting button
  • Click on "Disable Error Reporting"
  • It is great for you to check mark on "But Notify Me When Critical Errors Occurs"
  • Click OK and Apply.


If you have any questions regarding this post then don't forget to ask in comment!!!

Thursday 27 February 2014

How To Increase Windows XP Virtual Memory

How To Increase Windows XP Virtual Memory, tips and tricks


How To Increase Windows XP Virtual Memory


1. First you will need to find out that how much RAM is installed on your computer. To do this, go to the Properties of My Computer. You will see the amount of RAM that is displayed on the lower right hand side of the dialog box. As seen below:
How To Increase Windows XP Virtual Memory


2. Now go to Advanced > Settings tab
How To Increase Windows XP Virtual Memory


3. When you click settings, another dialog box opens, then go to Advanced tab and in the Virtual Memory section click the Change button.
How To Increase Windows XP Virtual Memory


4. Now , change the 2050 to 2050, if you have 768 MB of RAM and if you have 1 GB then increase it 2 times and then click on Set button, click OK and Restart your computer. You have now increased RAM in your computer which will help you to run applications and games faster than before.
How To Increase Windows XP Virtual Memory


If you have any questions about my post then don't forget to comment!!!!

Top 10 Keyboard Shortcuts

Top 10 Keyboard Shortcuts, computer tips and tricks, trick, tips,


Top 10 Keyboard Shortcut Keys:

  • Windows Button + E
  This shortcut key allows you to open Windows Explorer.
  • Windows Button + M
It allows you to minimize all the open windows and if you want to maximize your open window then Windows Button + Shift + M.
  • Alt + F4
This shortcut helps you to close the window or programs.
  • Shift + Delete
If you want to delete a file and you don't want to deal with it later in the Recycle Bin then this the way to go. It allows you to delete a file completely, it won't be in the Recycle Bin.
  •  Windows Button + U + U
It allows you to quickly shutdown your computer, hitting U to open the shutdown menu, and then hitting U again to shutdown.
  • Windows Button + Pause
It will allow you to get to the System properties.
  • Ctrl + C, Ctrl + V
Ctrl + C will copy a file, and Ctrl + V to paste the file anywhere you want.
  • Ctrl + Z, Ctrl + Y
Undo an action by pressing Ctrl + Z and if you want change your mind, Ctrl + Y will redo the action.
  • Shift + Arrow Keys
Holding the shift and pressing one of the arrows keys will highlight the text in MS-Word without the help of mouse.
  • Ctrl + U, Ctrl + B, Ctrl + I
It is used for text, if you want you text to be underlined then press Ctrl + U, if you want bold text then press Ctrl + B and if you want italic text then press Ctrl + I.


If you have any questions about this post then don't forget to comment!!


How To Use One Gmail Account And Create Many Accounts In One Site

How To Use One Gmail Account And Create Many Accounts In One Site, hacking tips


How To Use One Gmail Account And Create Many Accounts In One Site


It is a very fun trick, using this trick you can use your Gmail account to create as many accounts in one website. Like, if you have a Gmail account and you want to sign up on any website second time, or third or as many times you want then you use this trick. So, let's get started:

So the trick is that you have to add one or more "." (dots) in your old gmail account.
For example, my gmail ID is maqsood.memon1980@gmail.com
So when I want to sign up or register second time on a specific website then I will add one more dot "." to my Gmail ID : maqsood..memon1980@gmail.com, and add dots as many times you want.
If you are thinking that where you'd get the confirmation email then don't worry you will get the confirmation email or code on your real Gmail ID.

If you have any questions then don't forget to ask!! 


Wednesday 26 February 2014

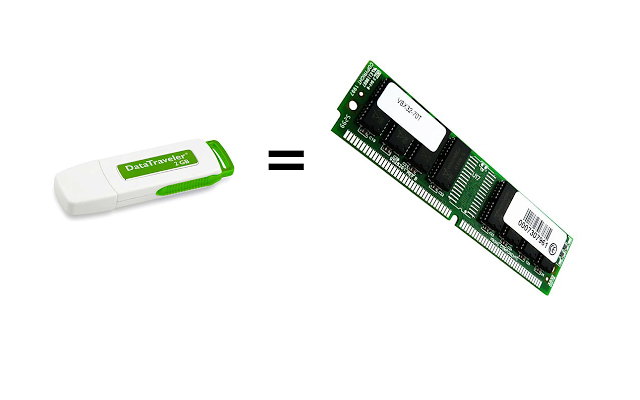
How To Use Pendrive As A RAM In Windows 7

How To Use Pendrive As A RAM In Windows 7


How To Use Pendrive As A RAM In Windows 7:


1. Open your computer.
2. Plug-in your pendrive.
3. Format your pendrive with NTFS or FAT32.
4. Now check use this device.
5. Choose maximum space to reserve system speed.
6. Click on Apply and OK.
7. Now you are ready to use your pendrive as a RAM.


Copyright @ 2013 Free tutorials.

Designed by Maqsood & Sponsored By MySoftShop.net