Thursday 27 February 2014

How To Increase Windows XP Virtual Memory

How To Increase Windows XP Virtual Memory, tips and tricks


How To Increase Windows XP Virtual Memory


1. First you will need to find out that how much RAM is installed on your computer. To do this, go to the Properties of My Computer. You will see the amount of RAM that is displayed on the lower right hand side of the dialog box. As seen below:
How To Increase Windows XP Virtual Memory


2. Now go to Advanced > Settings tab
How To Increase Windows XP Virtual Memory


3. When you click settings, another dialog box opens, then go to Advanced tab and in the Virtual Memory section click the Change button.
How To Increase Windows XP Virtual Memory


4. Now , change the 2050 to 2050, if you have 768 MB of RAM and if you have 1 GB then increase it 2 times and then click on Set button, click OK and Restart your computer. You have now increased RAM in your computer which will help you to run applications and games faster than before.
How To Increase Windows XP Virtual Memory


If you have any questions about my post then don't forget to comment!!!!

Top 10 Keyboard Shortcuts

Top 10 Keyboard Shortcuts, computer tips and tricks, trick, tips,


Top 10 Keyboard Shortcut Keys:

  • Windows Button + E
  This shortcut key allows you to open Windows Explorer.
  • Windows Button + M
It allows you to minimize all the open windows and if you want to maximize your open window then Windows Button + Shift + M.
  • Alt + F4
This shortcut helps you to close the window or programs.
  • Shift + Delete
If you want to delete a file and you don't want to deal with it later in the Recycle Bin then this the way to go. It allows you to delete a file completely, it won't be in the Recycle Bin.
  •  Windows Button + U + U
It allows you to quickly shutdown your computer, hitting U to open the shutdown menu, and then hitting U again to shutdown.
  • Windows Button + Pause
It will allow you to get to the System properties.
  • Ctrl + C, Ctrl + V
Ctrl + C will copy a file, and Ctrl + V to paste the file anywhere you want.
  • Ctrl + Z, Ctrl + Y
Undo an action by pressing Ctrl + Z and if you want change your mind, Ctrl + Y will redo the action.
  • Shift + Arrow Keys
Holding the shift and pressing one of the arrows keys will highlight the text in MS-Word without the help of mouse.
  • Ctrl + U, Ctrl + B, Ctrl + I
It is used for text, if you want you text to be underlined then press Ctrl + U, if you want bold text then press Ctrl + B and if you want italic text then press Ctrl + I.


If you have any questions about this post then don't forget to comment!!


How To Use One Gmail Account And Create Many Accounts In One Site

How To Use One Gmail Account And Create Many Accounts In One Site, hacking tips


How To Use One Gmail Account And Create Many Accounts In One Site


It is a very fun trick, using this trick you can use your Gmail account to create as many accounts in one website. Like, if you have a Gmail account and you want to sign up on any website second time, or third or as many times you want then you use this trick. So, let's get started:

So the trick is that you have to add one or more "." (dots) in your old gmail account.
For example, my gmail ID is maqsood.memon1980@gmail.com
So when I want to sign up or register second time on a specific website then I will add one more dot "." to my Gmail ID : maqsood..memon1980@gmail.com, and add dots as many times you want.
If you are thinking that where you'd get the confirmation email then don't worry you will get the confirmation email or code on your real Gmail ID.

If you have any questions then don't forget to ask!! 


Wednesday 26 February 2014

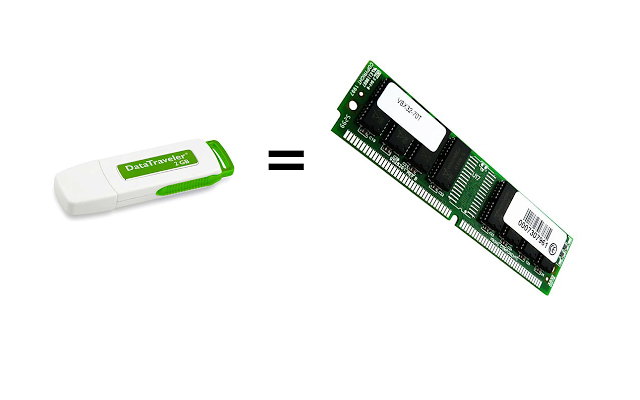
How To Use Pendrive As A RAM In Windows 7

How To Use Pendrive As A RAM In Windows 7


How To Use Pendrive As A RAM In Windows 7:


1. Open your computer.
2. Plug-in your pendrive.
3. Format your pendrive with NTFS or FAT32.
4. Now check use this device.
5. Choose maximum space to reserve system speed.
6. Click on Apply and OK.
7. Now you are ready to use your pendrive as a RAM.


Copyright @ 2013 Free tutorials.

Designed by Maqsood & Sponsored By MySoftShop.net